|
|
Author: Mike Wastewater Treatment Engineer Water Treatment Expert Time: Jun 18, 2025 Introduction: I'm Mike, I've been deeply engaged in the field of wastewater treatment and environmental protection equipment for a long time, with extensive front-line experience. I focus on engineering implementation and operation optimization, sharing practical and applicable industry insights. |

Detailed explanation of submersible mixer installation methods and precautions
Author: VIVAMIX technical team
Overview
In the actual application of sewage treatment, there are three common installation methods for submersible mixers: wall-mounted installation, guide rod installation, and bottom mobile installation. Today, we will analyze the installation methods and steps of the three methods, as well as the applicable scope of each installation method.
Installation method 1
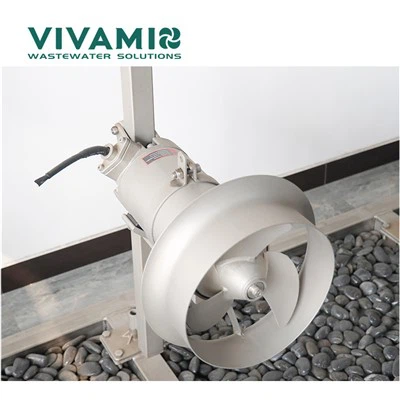
The first wall-mounted installation method is also called fixed bracket type. The mixer is directly fixed on the pool wall through the bracket. It is suitable for use scenarios with a pool depth of less than 3m, small pools or occasions with high requirements for installation positions. The structure is simple but the flexibility is low.


Precautions: The wall-mounted installation method is suitable for use when the pool depth is less than 3m, and the maximum length of the guide rod cannot exceed 3m.
Height adjustment method: Move the mixer up and down so that its impeller is located at a higher or lower position to adapt to water level changes or different water depths.
Angle adjustment method: Swing left and right to adjust the stirring direction of the impeller to control the flow direction of the water or strengthen the mixing of a specific area.
Connection method: Chemical bolts or expansion bolts are used to connect to the pool wall
The design of the wall-mounted installation method can flexibly adapt to various pool types (round pools, rectangular pools, irregular pools), improve the mixing efficiency by quickly adjusting the angle and height, and avoid uneven mixing in dead corners.
Installation method 2
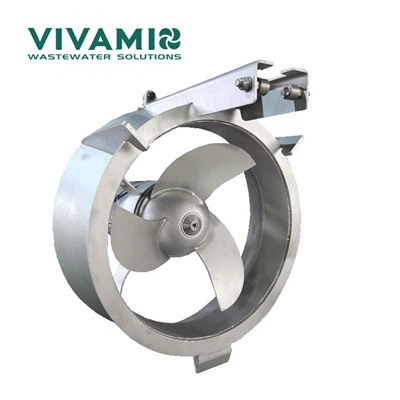
The second type: guide rod installation is also called rail installation. The upper hand-cranked hoist drives the steel wire to move the submersible mixer up and down on the guide rod or rail. It is very convenient to install and maintain. It is suitable for small and medium-sized pools and is widely used in sewage treatment plants. The installation sequence is generally lower bracket, guide rod, support frame up and down, lifting frame, hand winch. The hand winch can control the lifting and lowering of the mixer, and the operation is more flexible.


Note: When the pool depth is >5m, a support frame needs to be added in the middle of the guide rod
Adjustment method: The turntable pin can be adjusted to rotate around the Z axis in the horizontal direction
Connection method: chemical bolts or expansion bolts are used to connect to the pool wall
Installation method 3
The third type of mobile installation is also called base bracket type. The mixer is fixed on a movable bracket or base, which does not rely on the pool wall, making it easy to transfer and use between different pools. It does not require advance civil engineering and embedded parts engineering. The position can be adjusted at any time according to the process and usage scenario. The operation is simple and convenient, and the maintenance is convenient.
Installation method: Use a crane to place it directly in a suitable position, and it can be used directly after connecting the power supply


Need a Reliable Submersible Mixer?
Get expert advice, customized solutions, and competitive pricing for your wastewater treatment project.